Waterproofing Systems
How to install a Basement Sump Pump
Jun
How to install a Basement Sump Pump
A basement sump pump system is most commonly installed as part of a basement waterproofing installation using cavity membrane fixed to the wall and floor. Cavity membranes allow ground water ingress to enter a basement but will not, if installed correctly, pass through it provided that an efficient drainage system is installed behind the cavity membrane and is diverted to a basement sump pump chamber.
The most common question we are asked in respect of this kind of waterproofing system is; “Do I need to actually install a sump pump, because the basement is dry normally”.
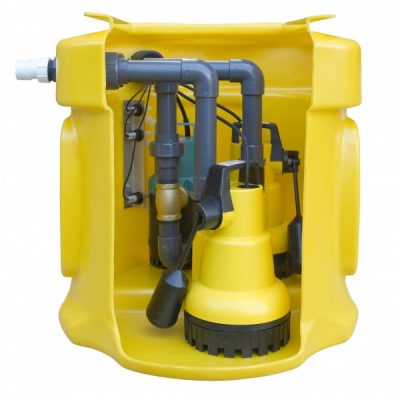
As qualified waterproofing designers we have a duty of care to point out that on installing a cavity drain membrane system such as supplied by the likes of Delta Membrane Systems, John Newton, Wykamol, Triton, Premcrete, Danosa, Oldroyd and others, they should be supported by a drainage channel product that’s function is to collect ground water efficiently and that is also maintainable by being accessed to flush through the system to keep it clear of any blockages created by build-up of silt fines.
Then, such drainage systems should be directed to a sump location, or, if an open elevation is available to an external ground level, then a gravity drainage method can be applied without the need for a sump.
Either way, if you choose to install cavity membranes to walls and floors and not include any kind of drainage system then in summary, you do not have a waterproofing system you simply have a dry lining system and which is not recognised as an acceptable means to convert a basement or cellar fit for habitable use.
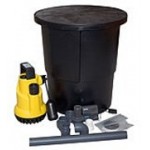
There is a practical decision to be made despite what regulations tell us. If you convert a Cellar or Basement then the use that you are putting it to should form part of your thinking. For instance, if you are going to turn a damp and unused Cellar into a useful additional bedroom you will be adding value to the property that may run to £20,000 – £30,000 depending on the location of the property. For the sake of a few hundred pounds of a drainage system and between £400 to £1500 for a sump and pump system, depending on what you have, then in the scheme of things, its a fantastic return on the cost.
If all you want to achieve is a location to store the golf clubs then the consequence of failure for having a flood and with no sump system is only going to run out to a few hundreds of pounds.
So its all down to risk over reward, whats correct and whats wrong and how to go about it properly.
Having decided to install a basement sump pump system the location for it is determined by three criteria:
- Is there a natural fall towards a corner of the basement?
- Where am I pumping out to?
- Will it be easy to access for routine maintenance?
If I work those criteria back to front, if a full on double pump system were installed you could possibly hear the pumps working if they were fully engaged. So you might want the sump chamber to be located in a storage cupboard or under the stairs down into the basement but an out of the central part to the living space especially if its a bedroom.
You need to decide on the external point of where the pumps will discharge ground water ingress. Ideally this would be into a surface water gully at ground level taking rain water from the roof. Once the external location is decided you then want to avoid a lengthy network of pipe running from the sump chamber trying to minimise the number of 90 degree bends in the route. The harder the pump/s have to work to force water around bends and long distances the shorter their life. So ideally, the sump location would be as near as possible to the external drainage location.
If a fall is present within the floor slab then why fight against that if water were to come in. If next to no fall were present then there is no need to artificially create one and water, under hydrostatic pressure, will naturally get into the drainage system and make its way around to the sump location.
So that’s how you decide on the sump location.
Next, you have to dig a hole big enough for the chamber to sit in so that the access lid is finished flush with the floor slab or screed but which allows for at least a 150mm concrete plinth to sit the chamber on and shuttered by 150mm of concrete or pea shingle.
Manufacturers generally state a concrete back-fill. The reason for this is to withstand any effects of ground water pressure ‘popping’ the chamber up out of its position. Again, this is another judgement call and determined by the risk of ground water or rising water tables.
A key point on forming the sump hole…….
You can be merrily digging the hole which is typically going to be anywhere between 500mm to 750mm deep when you hit water in the ground! That’s a bit of a nightmare if you were not expecting this. Firstly it slows up the process and secondly it will be hard to form the foundation to sit the sump on.
This happens when you have dug down deep enough that you are coming into contact with the water table or that you are doing the work after a spell of rain fall and a temporary perched water table is present.
On such occasions and to keep the job moving you would dig another hole near to the main hole down to the point you reach water again and drop in a temporary puddle pump with a hose to run to the outside. This will de-water the ground sufficient that you can complete the excavation of the main hole and form the plinth and shutter the sump in.
These situations can be very alarming if you hit the water table and water comes in at a quick rate. Be prepared and better still, do as much research as possible before undertaking the job which means creating bore holes to establish the presence of water and or the location of the footings in order that you can form a drainage gully at least 75mm deep into the slab to accept Basedrain or Aqua Channel. When doing this it is advisable to have a Waterstop Plug compound to hand to plug bore holes.

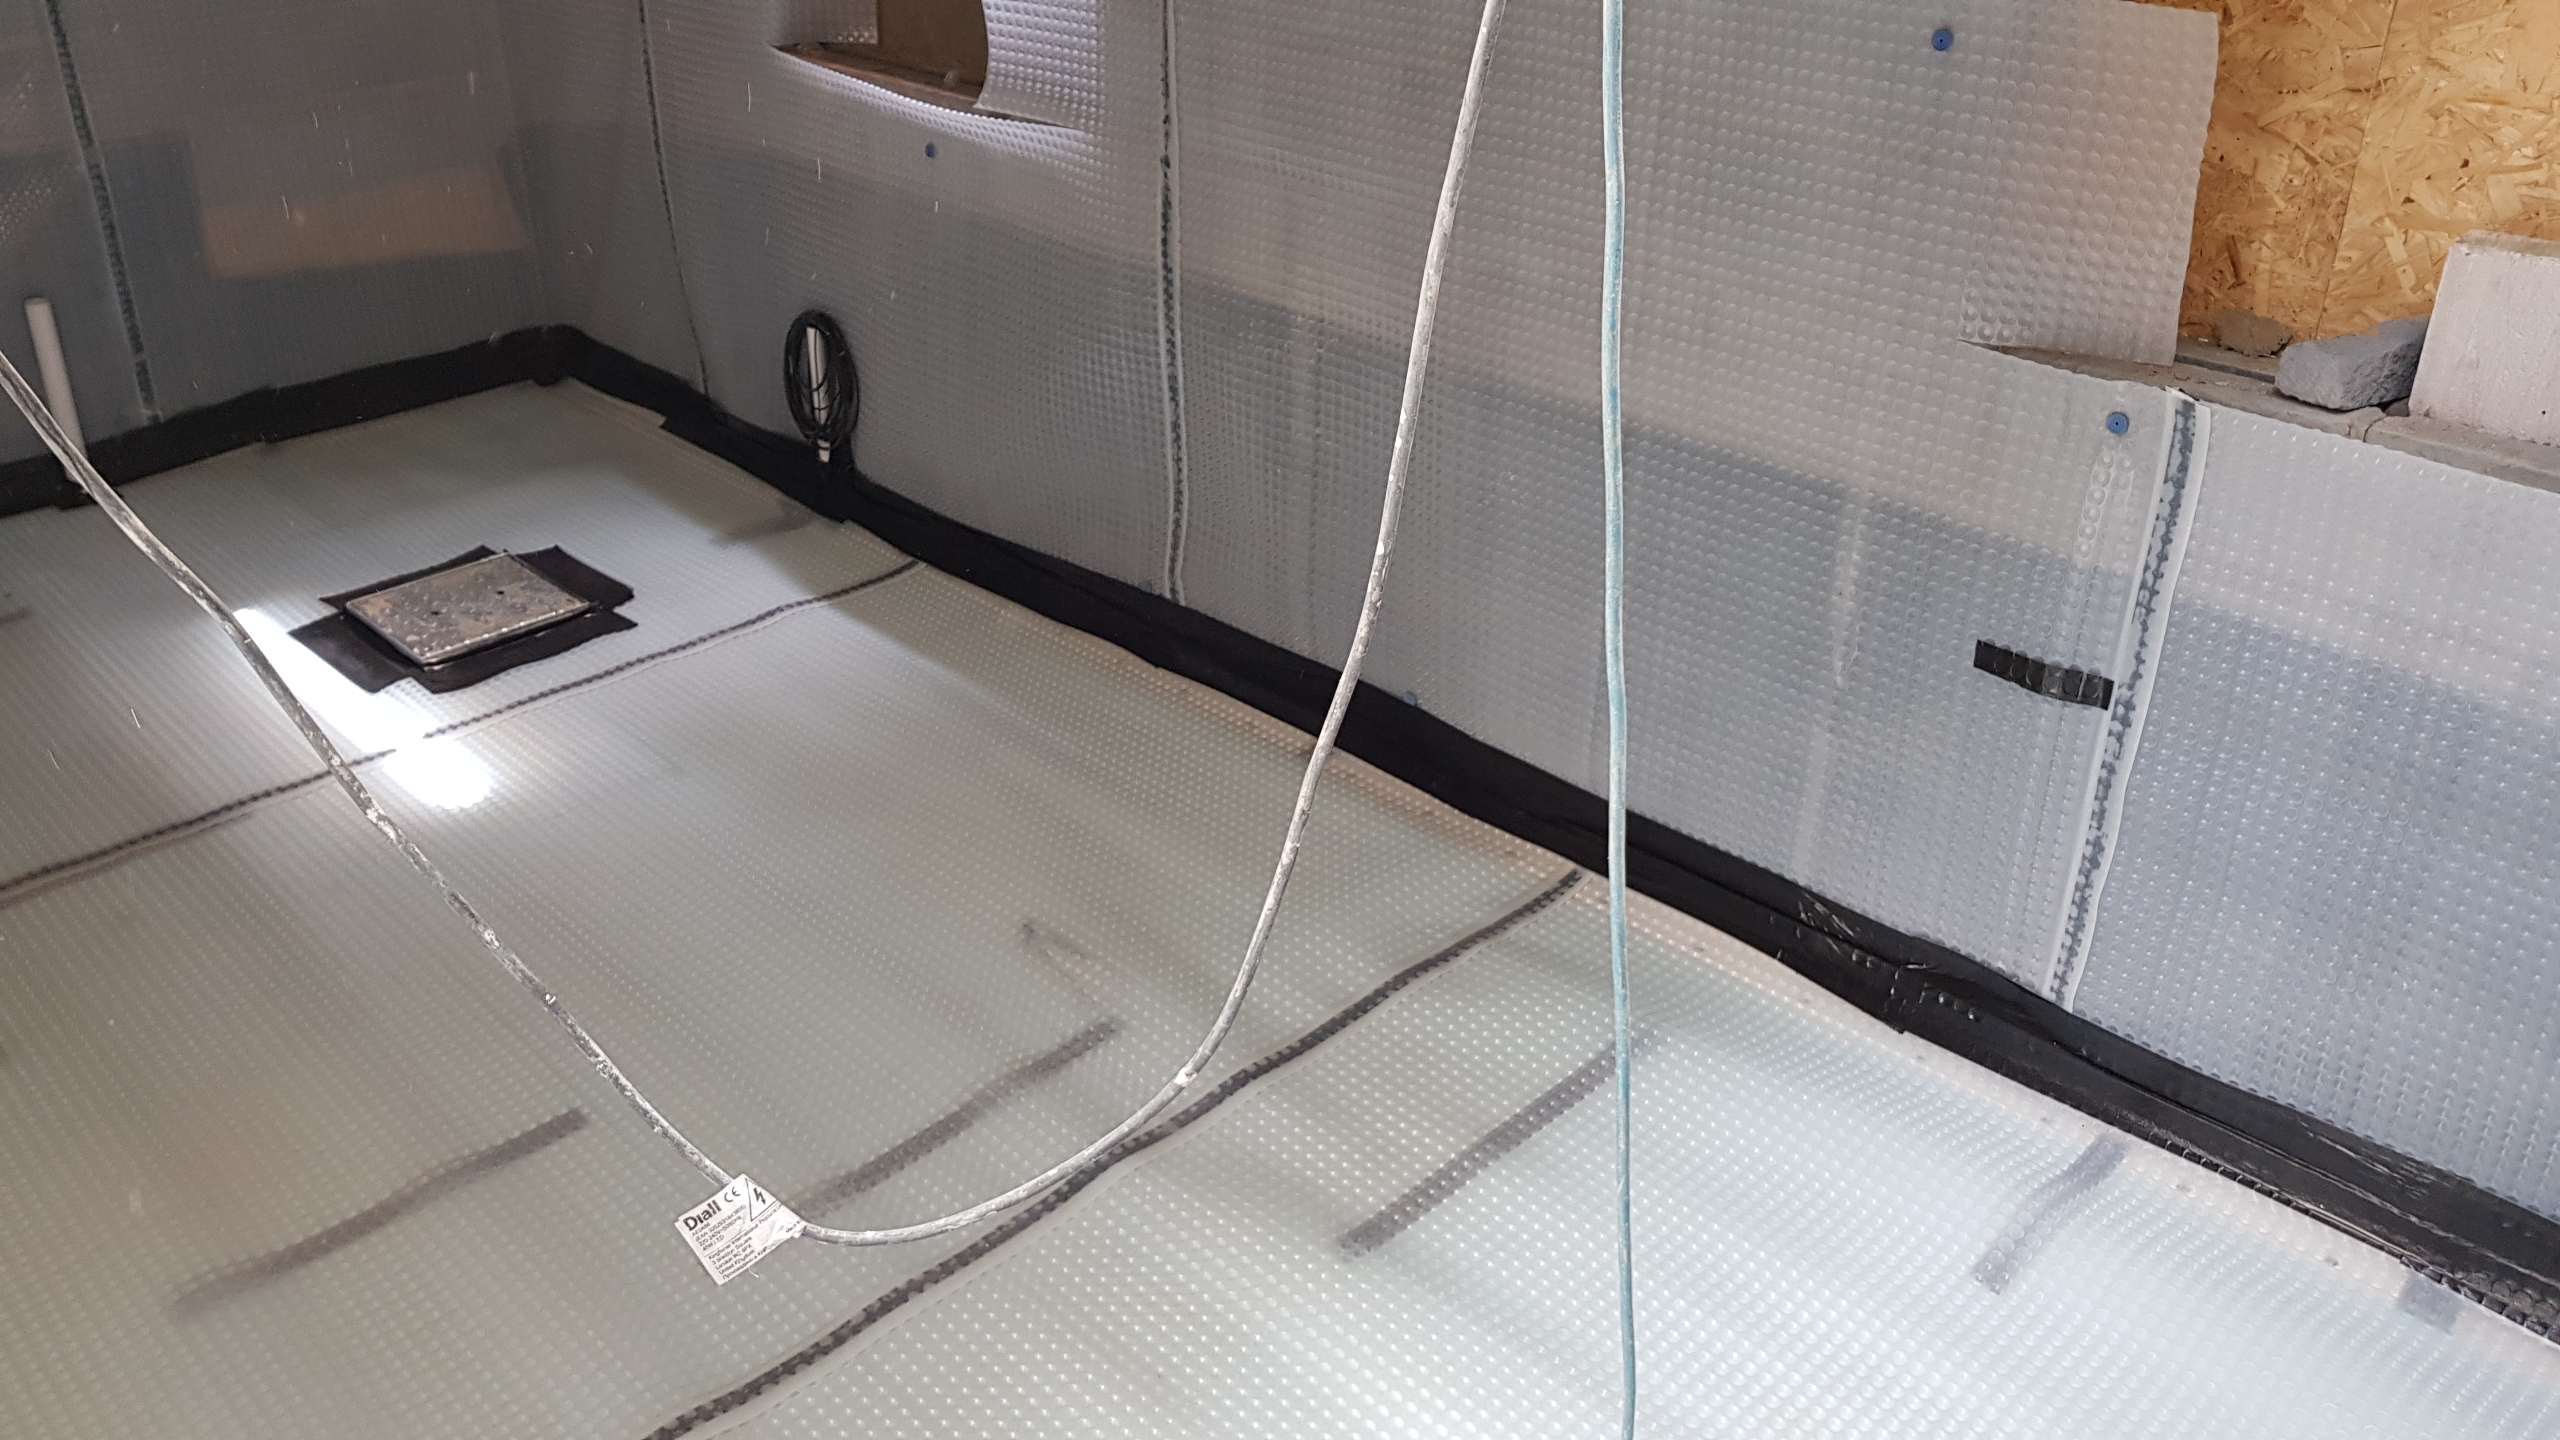
Coinciding with the sump hole formation the drainage detail is also formed. This can be in the form of a perimeter channel formed in the top of the slab. A perforated land drain, also in the top of the slab, (popular choice as but not many options available to flush it from rodding points), or, a Central drain system which is a network of 110mm drain pipe run under the slab with upstands coming through the top of the slab and cut level with it.
The drainage system of choice terminates into the sump chamber so the inlet holes have to be formed in the panels of the sump chamber. An outlet hole for the pump needs to be formed through the chamber and a conduit hole for the pump/s electrical cables.
Here is a great explanatory video showing an example of such an installation:
Once these have all been formed, everything made water tight the sump can be secured with the back-fill process.
Before the floor membrane goes down it is vital the sump system is commissioned. This is done by carrying out a ‘Flood Test’ by introducing some significant volumes of water across the floor slab typically by using a garden hose. Try and achieve a covering of at least 25mm of water across the slab and monitor its flow into the drainage channel first and then into the sump as it makes it way along. Ideally with sufficient volume to raise the float arm and the pump kicks into action and evacuates the water. Any areas where the water has sat on the slab and not found its way into the drainage channel you simply chase out a small gully on the top of the slab to allow this water to drain into the channel.
Where a new concrete slab has been cast it is vital to apply a lime inhibitor across it and in the drainage gully or around upstand openings as limes present within the concrete will otherwise leach out and form blockages within the drainage detail and clock the pump/s themselves making the whole system become defective.

Here is an excellent video from Delta Systems showing how a sump pump system is set up including the option of high level warning systems and back-up options in the event of a power failure.
There you have it. We have covered firstly the need for installing a basement sump pump. Where to locate it. How to form the hole. Setting the drainage detail out and forming the holes in the sump panels for inlets, outlets and power cables. We have covered testing the the whole system before applying the floor membrane.
This is a good example of how a typical sump installation will look as the finished job before a screed is poured or floating floor laid:
For any advice with your basement conversion please email your details to: info@allianceremedialsupplies.co.uk
Hey! I stumbled upon your blog while learning about sump pump installation. I enjoyed the thorough information you shared and save a lot of time. Thank You.
Hi FristChoice Waterproofing,
Thank you for taking the time to write your comment reference our Sump Pump blog. Glad you managed to gain the necessary info you needed to for a project you may of had in hand.
Much appreciated
Alliance Remedial Supplies